Last week I had a university assignment: to create a stylized weapon using multiple software tools and following a high-poly to low-poly workflow. At first, the whole concept felt overwhelming and foreign. We had some exercises to introduce us to the process, but it didn’t really click, and I jumped into the project without fully understanding the steps. Now, with the project complete, I feel much more confident and like I finally understand this workflow—what it is, why it’s useful, and, most importantly, how to execute it.
While still this might not be the best approach, I wanted to share what I learned in a past week. So here is the breakdown of my process, from start to finish.
1. Design Document
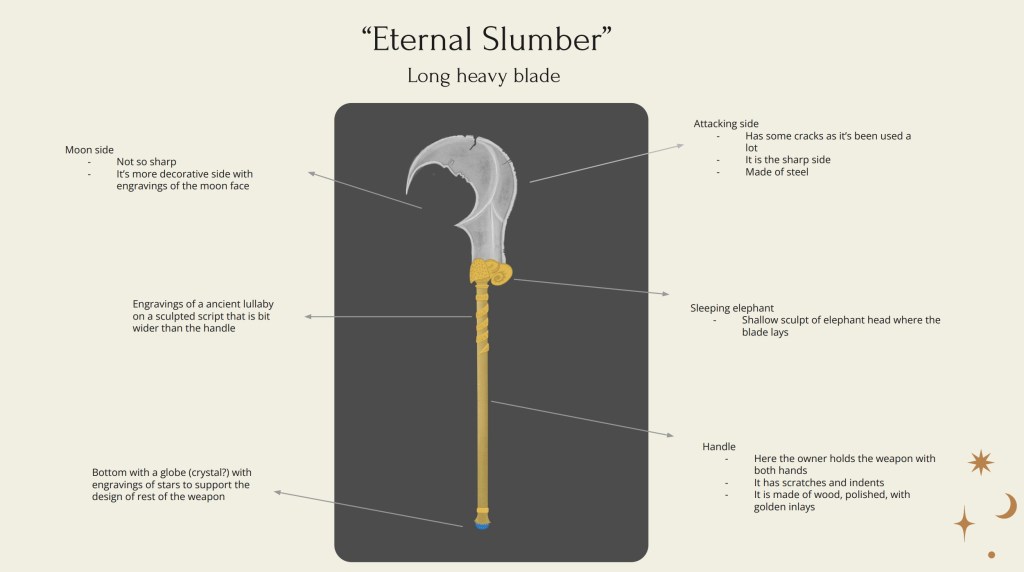
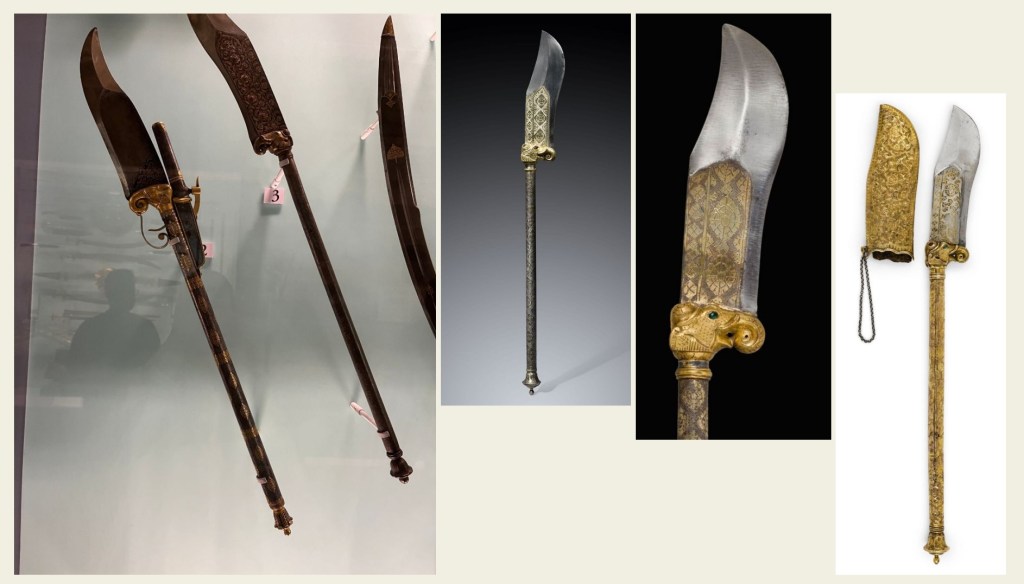
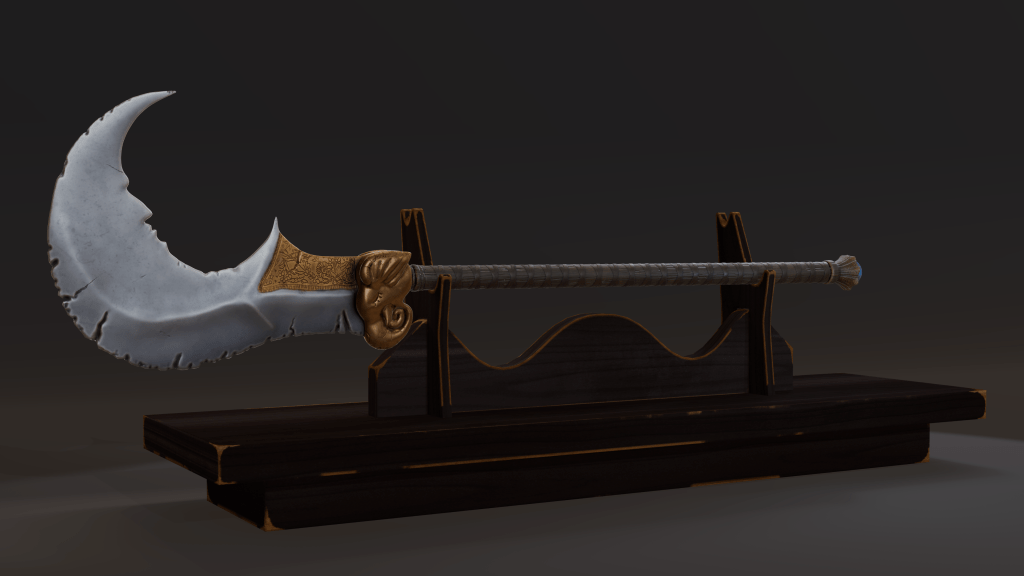
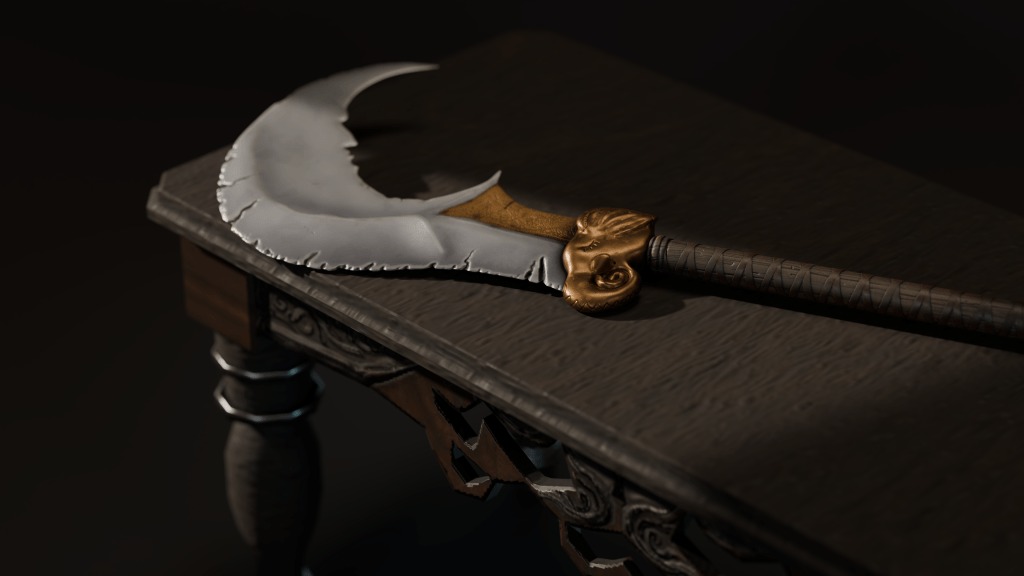
Before jumping into 3D software, we started with a design document to sketch the weapon, gather references, and map out a plan. Our theme was a stylized medieval weapon. I remembered that on my last trip to India I went to Udaipur City Palace museum which had amazing weapon collection. Finally taking photos at museums has paid off. These photos, along with Pinterest references, inspired my concept of a “Eternal Slumber” weapon. Although I wasn’t entirely satisfied with the design, I had to keep moving due to time constraints.
2. Blockout and High-Poly Sculpt
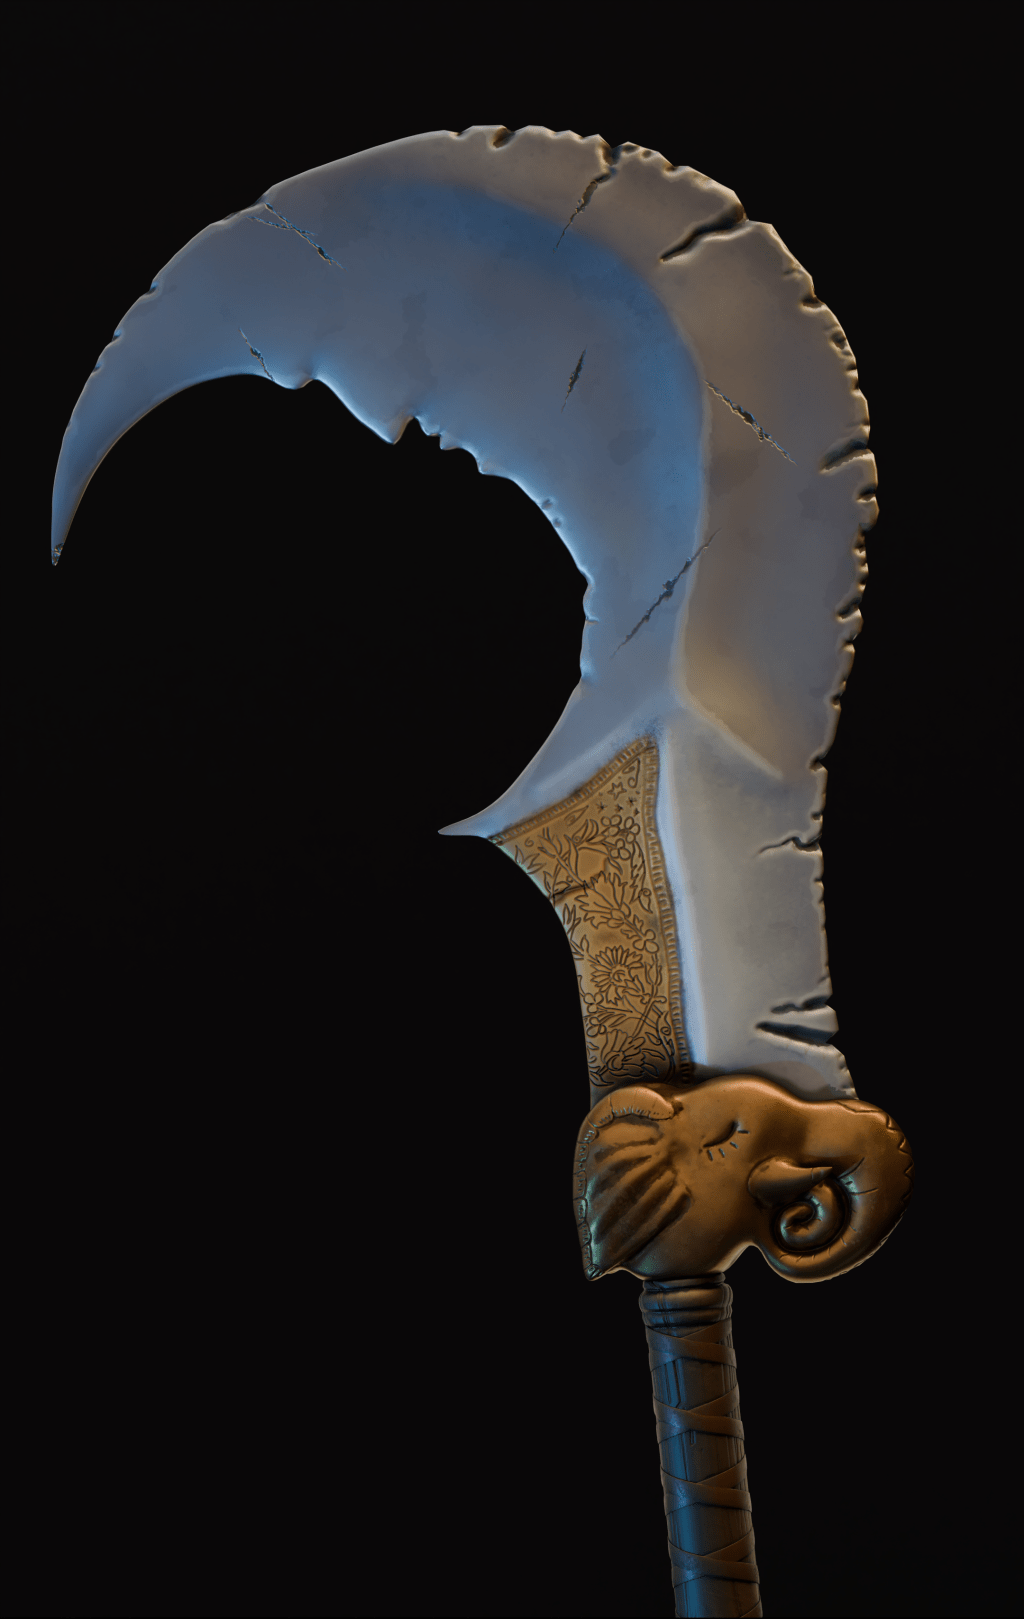
Once my design got approved, I began blocking out the basic shapes in Blender. With several organic elements, I knew it would be best to leave it mostly for ZBrush, particularly the elephant and the blade. Here, I tried to get that stylized look so I spent whole day sculpting all the details. I was deciding which details to sculpt and which to save for texturing. For example, I could have used Substance Painter to add engraved details, but I chose to sculpt them in ZBrush because it felt more natural and enjoyable. This step took the longest, but it gave the weapon its defining details.
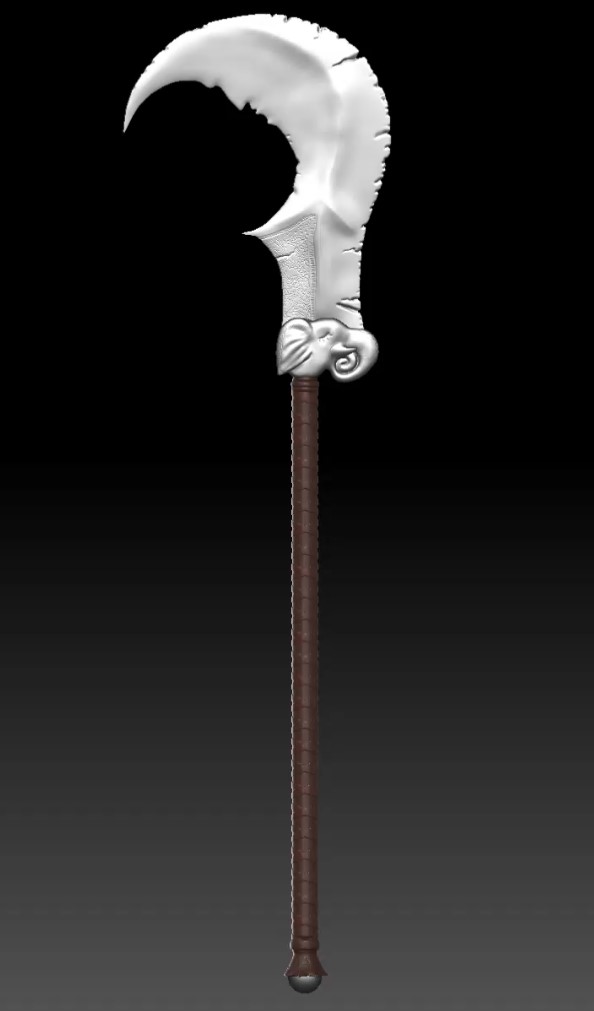
Blender blockout (left), ZBrush high-poly sculpt (right).
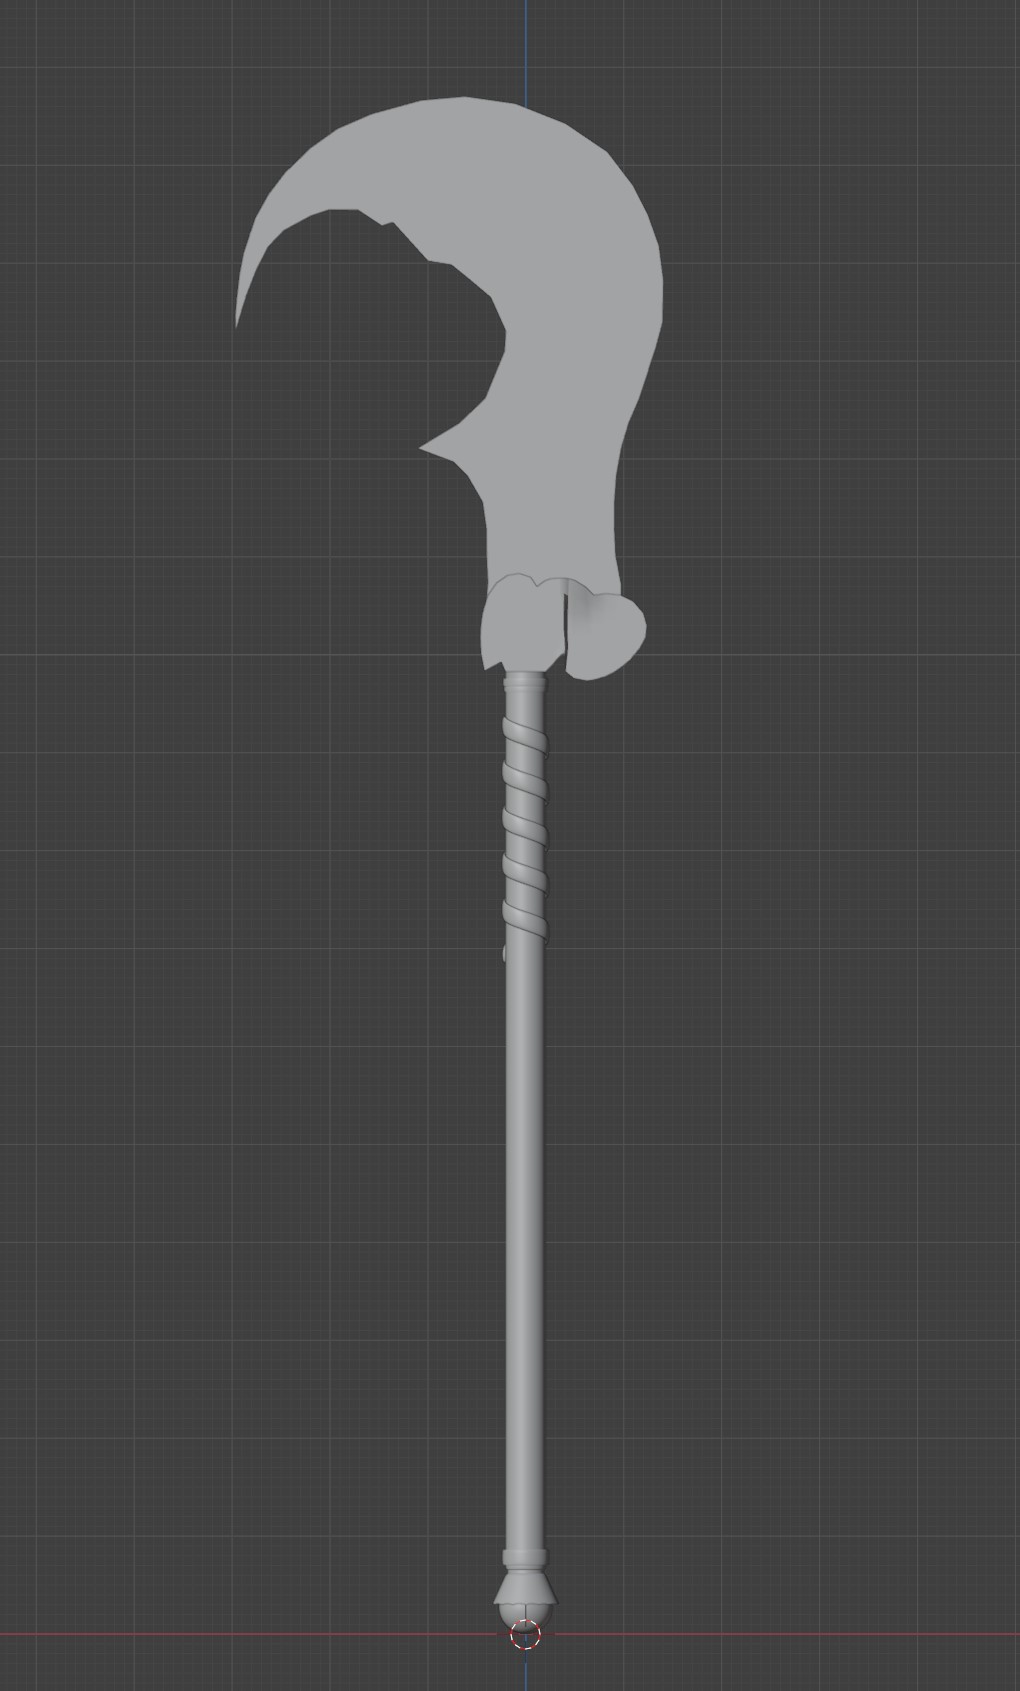
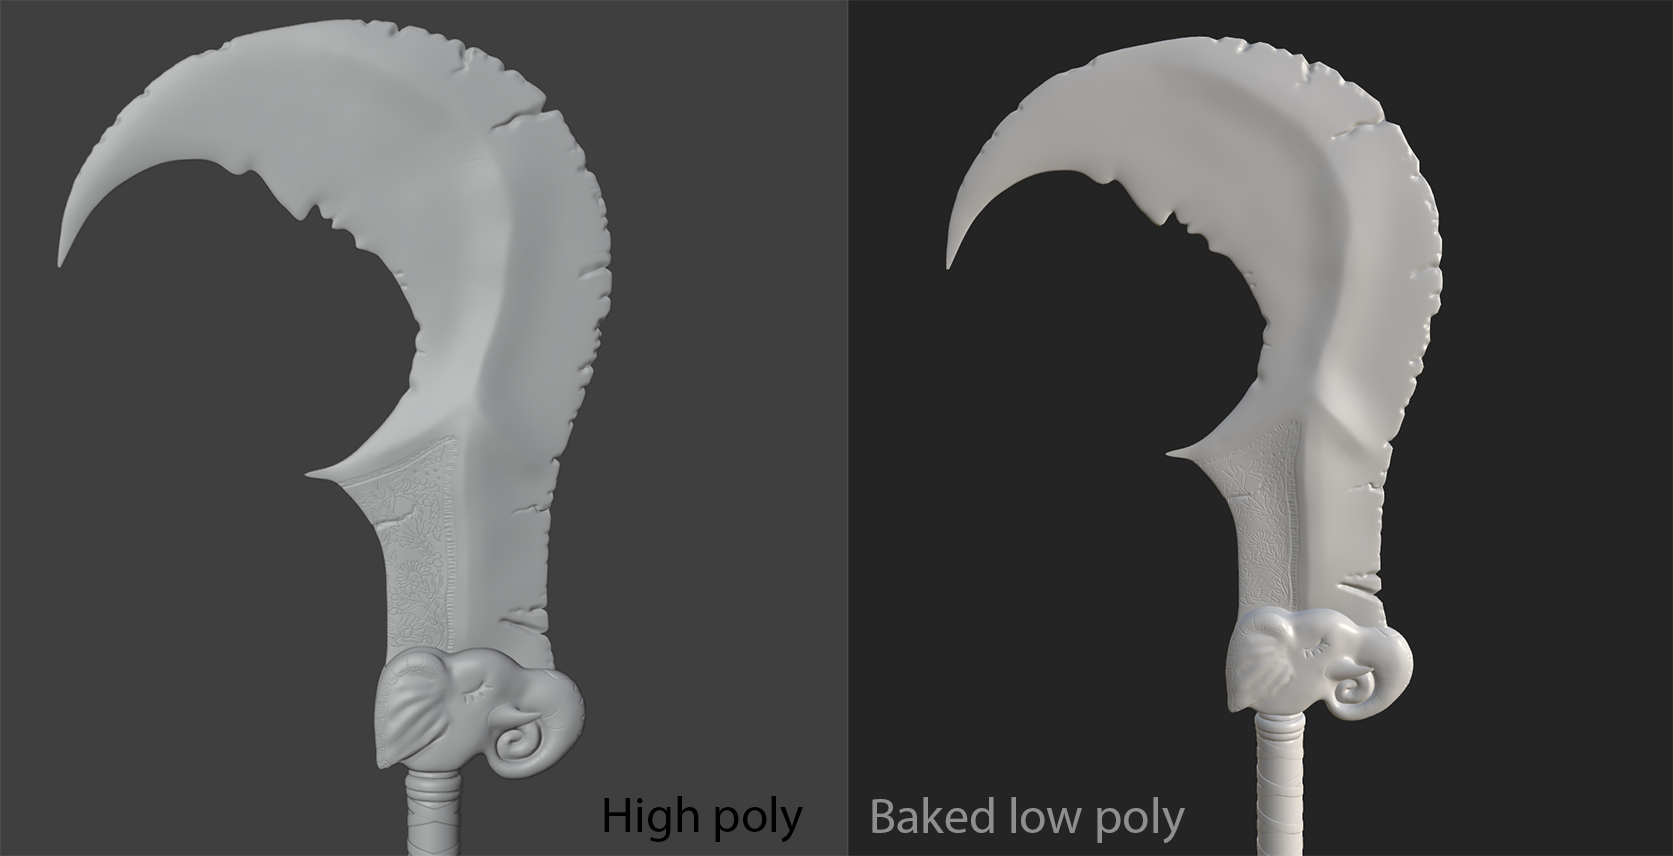
3. High-Poly to Low-Poly Workflow
Initially, this part seemed most intimidating, because I didn’t fully understand how and why is it done, but by the end, it made perfect sense. Essentialy, this method helps to get all the details of high-poly mesh baked onto a texture maps which are then applied to a low-poly mesh. This ensures that asset looks high-poly but mantains low-poly performance. I’ll write a more in-depth post on this process soon, as I believe it’s a critical technique and would be nice to have a cheatsheet for it.
For this stage, I used Blender to unwrap my low-poly model and Substance Painter to bake the high-poly details onto it. Substance Painter is especially helpful because it lets you transition straight into texturing after baking, making the workflow more streamlined.
4. Texturing in Substance Painter
With the model ready, it was time to put some colors on, which presented a new challenge—making them look stylized. Since I hadn’t created stylized textures before, I spent lot of time researching techniques, learning that exaggerated colors, baked lighting filters, and using painting brushes can all help create more stylized look. Also avoiding pre-made smart materials, which often aim for realism, and instead focusing on creating custom materials from scratch.

5. Look Development
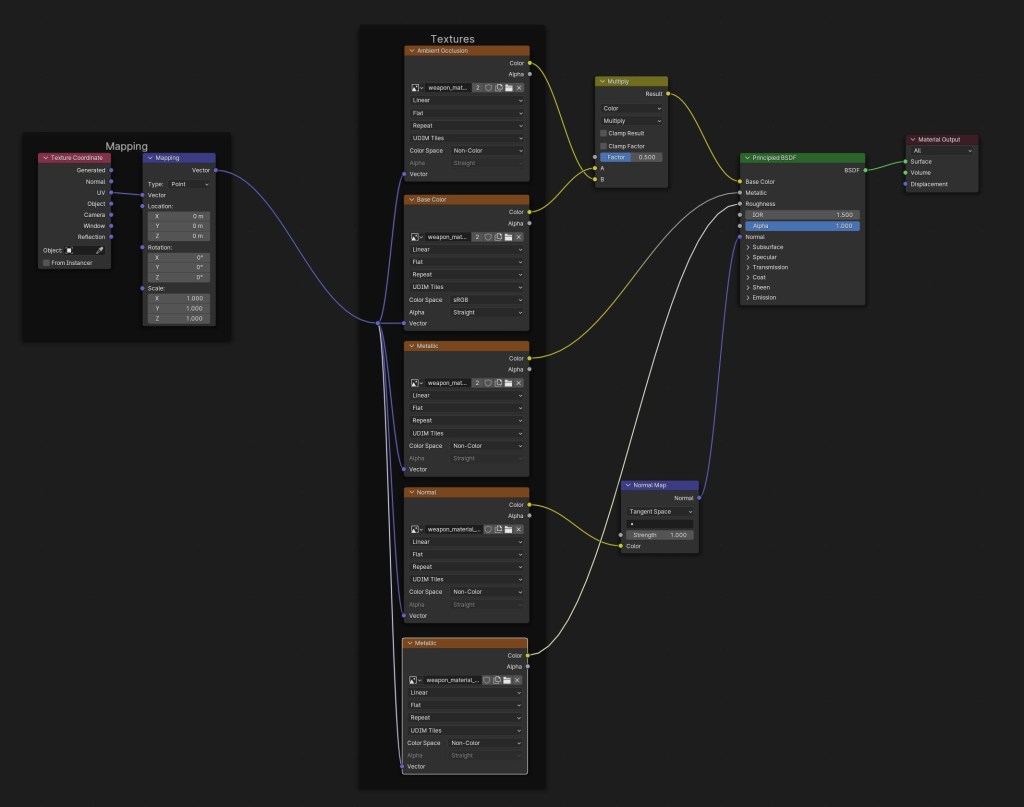
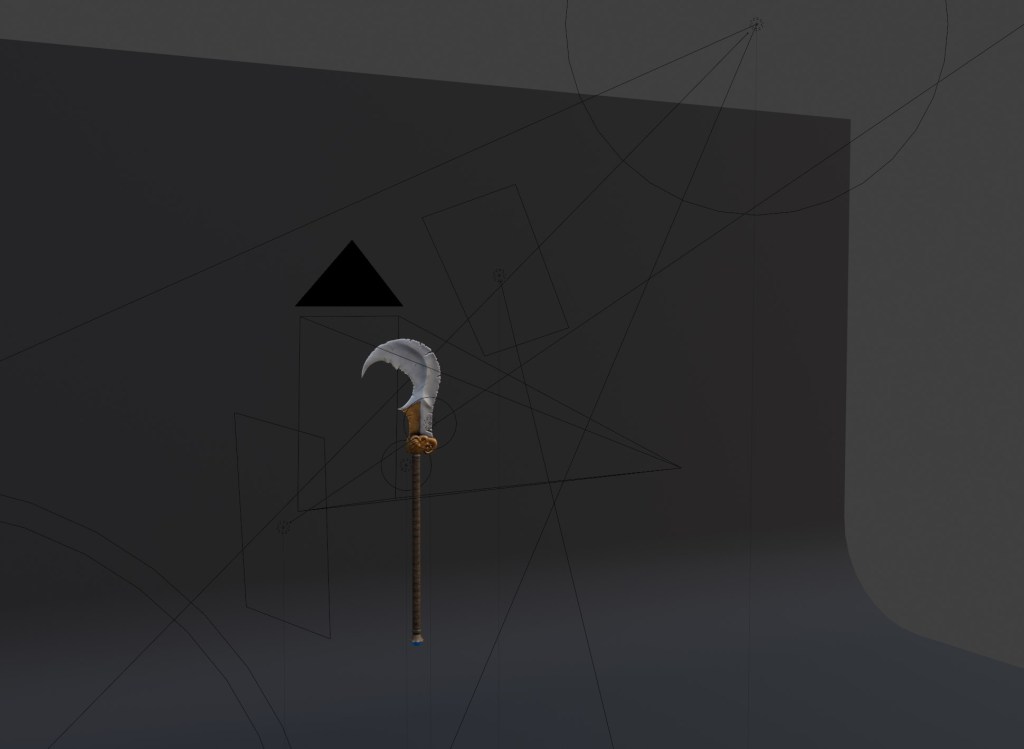
The final stage was look dev, where everything comes together. I used Blender where I had my low-poly model, imported textures from Substance Painter, and put them together in Shader editor. Then I created a simple scene where I added a backdrop, lighting, and imported props to showcase the weapon. This is the fun part where you can experiment with different compositions, lighting styles, and overall presentation.
Conclusion:
In the end, I felt relatively happy with the result, though there were definitely areas for improvement. Overall, I am not sure how stylized it actually is but my feedback from teacher noted that the blade’s cracks looked too soft. I agree with that now when I look back. I also overshot on the poly count, hitting around 60k tris which would be too high for a game asset. I still find it challenging to keep my poly count low but it’s something I find very interesting and I am definitely planning on practicing that aspect of modeling further.
Although my main interest is environment art, I found this project extremely valuable. Many of the skills I practiced here—like high-to-low poly baking, uv-unwrapping, stylized texturing —are crucial for creating props in environments for example. I’m genuinely excited about the things I learned throughout this process and I’m already planning on doing more similar personal projects.

Leave a comment